Traversing NAT Firewalls

NAT Firewalls throw up a few interesting problems for an Audit Vault system. Due to the various network channels, a variety of solutions are needed, as each network channel differs in how it does address translation. In addtion to this, the target database will affect the way NAT is traversed.

There are three essential connections. The first connection required is that between the Audit Vault server and the Audit Vault Collection Agent. By default, the agent listens on port 7000 for connections from the Audit Vault server. The hostname or IP address is obtained by the server by querying the AVSYS.AV$AGENT table, and the hostname is then resolved on the server (if necessary). The agent also has to be able to connect to itself in order to be installed or started. This means that the hostname/IP address must be resolved locally on the agent machine too. Due to NAT, the IP address cannot be used*, so a hostname must be used. This hostname must resolve to the external IP address on the Audit Vault server, and to the internal IP address on the agent host. The simplest method of achieving this is to alter the hosts file on each machine to add a unique entry.

* Technically, the IP address can be used by using the internal IP address and creating a forwarding rule on the Audit Vault server that redirects traffic to the external IP address when the internal IP address is the destination. This is required for non-Oracle databases. Note that you can still use the hostname method if the Audit Vault server resolves the agent hostname to the internal IP address.

The second connection required is from the agent to the listener on the Audit Vault server. By default, this will be port 1521 on the Audit Vault server. These connection details are stored in the tnsnames.ora file in the agent’s Oracle home. As such, the external IP address of the Audit Vault server can be used, or a hostname that resolves to the external IP address.

The third connection required is from the agent to the source database. This is where the method differs between Oracle and non-Oracle source databases. For Oracle databases, the same method as for the first connection is needed*. This is because the agent must be able to connect locally to the source database, so it must resolve the address to the internal IP address, and the Audit Vault server needs to be able to connect to the external IP address in order to do audit policy management and gather entitlement snapshots.

For non-Oracle source databases, a connection does not need to be made from the Audit Vault server to the source database. The agent needs to connect to the source database, though, and in order to do so, the agent queries the Audit Vault server to obtain the source database connection details. The big issue here is that the Audit Vault server will resolve the hostname before sending it to the agent, so the server must resolve the hostname to the internal IP address of the source database. This puts it at odds with the first connection, which requires that the server resolve the hostname to the external IP address!

The solution is to set up forwarding on the Audit Vault server which redirects all traffic destined for the source database’s internal IP address to its external IP address, and to use the internal IP address (or a hostname that resolves to the internal IP address) for all connections.

* If entitlement snapshots and/or audit policy management are not required, then the internal IP address, or a name that resolves to the internal IP address, can be used.

As you can see, there are a few issues with traversing NAT but they can all be resolved.
Windows Collection Agent Installation

Installing the agent software on a Windows machine can throw up a couple of issues which can either prevent the successful installation of the software, or cause issues when starting collectors.

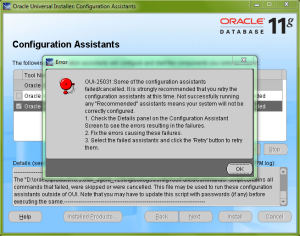
A common issue when installing the agent is a failure during the Audit Vault Configuration Assistant step.

winagenterror1

The $ORACLE_HOME\av\log\avca.log will have the following in it:

java.lang.Exception: Unable to locate av.properties file.

This issue can be resolved by not using the Windows machine’s hostname. Either use the IP address, or create a new unique entry in the hosts file of both the Windows machine (C:\Windows\system32\drivers\etc\hosts) and the Audit Vault server (/etc/hosts), and use that as the hostname. For example, you could add the following to each:

192.168.10.123     testagent

You would then add the agent with the command:

avca add_agent -agenthost testagent -agentname testagent01

The second issue occurs when trying to start a collector after running the avorcldb setup command (or the equivalent for any of the other databases).

winagenterror2

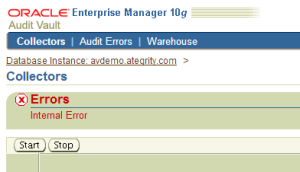
The error given by avctl start_collector is an Internal Error, and investigation of the collector logfile ($ORACLE_HOME\av\log\<source>-<collector>-0.log) shows that the problem is:

java.sql.SQLException: ORA-12578: TNS:wallet open failed.

This issue is resolved by granting Full Control to the Administrators group for each of the 2 files in the $ORACLE_HOME\network\admin\avwallet folder: cwallet.sso and ewallet.p12. These grants must be done any time the avorcldb setup command (or the equivalent for any of the other databases) is run.

Troubleshooting the REDO TRANSACTION LOG audit trail

Audit Vault and Database Firewall 12c (AVDF) is not very user friendly when it comes to error messages. This is particularly apparent if you’ve ever tried setting up a TRANSACTION LOG audit trail for an Oracle Database secured target.

If AVDF encounters any problems during setup, it will simply give a generic “There was an error” message.

After trawling through various log files and finding nothing, I eventually found the location of the error, which included additional information as to the cause.

All audit trail information, including any error messages, are stored in the AVDF database in the AVSYS.AUDIT_TRAIL table. In order to find out what is preventing the TRANSACTION LOG audit trail from being set up, issue the following command while logged onto the AVDF database using SQL*Plus:

SELECT ERROR_MESSAGE FROM AVSYS.AUDIT_TRAIL WHERE AUDIT_TRAIL_TYPE='TRANSACTION LOG' AND HOST_NAME='your.host.name';

Often, the reason will be due to an initialisation parameter. Fixing this parameter will then allow the trail to be set up.

First Impressions: Oracle Audit Vault and Database Firewall

Oracle have released their latest product in the Audit Vault line – this time combining it with another product, Database Firewall. Below, I talk about some of the major differences between this new version and the previous version (10.3).

Appliances

The new product is appliance based, which means that installing it involves overwriting the OS. It also means that there is no upgrade path from 10.3 to the new version (12c). This presents a number of problems for existing users of Audit Vault:

  1. What do we do with the audit data that has been gathered by the older version?
  2. Do we continue to run both systems (old and new) in order to report on historical information?
  3. How can we switch from one system to the other without problems?

I hope to answer some of these questions in a future post.

Data Structure

Another major change is the underlying data structure. No longer are there multiple dimension tables linked back to the AUDIT_EVENT_FACT table. Instead, the data is contained in a single table, which is used for audit logs and firewall logs.

The major impact of this is that all reports that have been written for BI will need to rewritten to take the new structure into account.

Alerts

The alerts system appears to have had an overhaul too. Most importantly, we can now create alerts that can look at more than one audit record, and that can cope with more advanced criteria.

Reports

The reports have been improved, and can now cope with more than 20,000 records. Unfortunately, there is still a limit: 999,999 records. This means that separate BI tools are still needed for creating some reports.

Collection Agents

The collection agents are no longer installed using the OUI. Instead, they are supplied as an agent.jar file which already contains the necessary information to connect to the server. I had no problems getting it up and running on a linux x64 system, but getting it to run as a Windows service was far more problematic.

Collectors

Oracle have now provided a plugin framework that allows collectors to be created for any audit source. This greatly enhances the possible uses of the system, allowing for the collection of audit data from any database platform, applications, and operating systems. However, there are still a few wrinkles to be worked out. Again, I had no problem in setting up a DBAUD and OSAUD collector on my linux x64 system, but was unable to do so on the Windows system due to a missing executable (avorclcoll.exe). Also, I am yet to successfully set up a REDO collector on the linux system.

EDIT: Bundle Patch 1 fixes the Windows problem. The executable is now present and working.

Final Thoughts

I’m still in the process of evaluating the new product, and haven’t even begun to look at the firewall side yet. Having said that, there are lots of promising new features in the new product, but a few things that still need to be resolved too. We will be continuing to use the previous version (10.3) for the time being until we are satisfied that these issues have been addressed.

Reconstructing User Entitlement Reports

Constructing standard audit reports in a 3rd party tool is relatively straightforward, and the information required to do so is provided by Oracle in their Auditor’s Guide. The User Entitlement reports, however, are not documented. In particular, the comparison reports, which compare one snapshot with another, can be particularly tricky.

The following is an example of the User Accounts – Changes report, expressed as a SQL statement. This can be used as the basis for 3rd party reporting:

select * from
((select 'START' label, source_name, username, account_status, lock_date, expiry_date, default_tablespace, 
temporary_tablespace, created, profile, initial_rsrc_consumer_group, external_name from
(select source_name, username, account_status, lock_date, expiry_date, default_tablespace, 
temporary_tablespace, created, profile, initial_rsrc_consumer_group, external_name
from avsys.av$ue_dba_users u, avsys.av$ue_label l, avsys.av$ue_snapshot_label_mapping m, avsys.av$ue_snapshot s
where u.snapshot_id = s.snapshot_id and u.snapshot_id = m.snapshot_id and m.label_id = l.label_id and label_name = 'START'
minus
select source_name, username, account_status, lock_date, expiry_date, default_tablespace, 
temporary_tablespace, created, profile, initial_rsrc_consumer_group, external_name
from avsys.av$ue_dba_users u, avsys.av$ue_label l, avsys.av$ue_snapshot_label_mapping m, avsys.av$ue_snapshot s
where u.snapshot_id = s.snapshot_id and u.snapshot_id = m.snapshot_id and m.label_id = l.label_id and label_name = 'END'))
union all
(select 'END' label, source_name, username, account_status, lock_date, expiry_date, default_tablespace, 
temporary_tablespace, created, profile, initial_rsrc_consumer_group, external_name from
(select source_name, username, account_status, lock_date, expiry_date, default_tablespace, 
temporary_tablespace, created, profile, initial_rsrc_consumer_group, external_name
from avsys.av$ue_dba_users u, avsys.av$ue_label l, avsys.av$ue_snapshot_label_mapping m, avsys.av$ue_snapshot s
where u.snapshot_id = s.snapshot_id and u.snapshot_id = m.snapshot_id and m.label_id = l.label_id and label_name = 'END'
minus
select source_name, username, account_status, lock_date, expiry_date, default_tablespace, 
temporary_tablespace, created, profile, initial_rsrc_consumer_group, external_name
from avsys.av$ue_dba_users u, avsys.av$ue_label l, avsys.av$ue_snapshot_label_mapping m, avsys.av$ue_snapshot s
where u.snapshot_id = s.snapshot_id and u.snapshot_id = m.snapshot_id and m.label_id = l.label_id and label_name = 'START')))

In order to get the changes, we need to UNION two subqueries, each of which uses the MINUS operator. END MINUS START will show the records in END which do not exist in START, or have changed, and vice versa.

Changing the Audit Vault Timezone

In order for alerts and reports to show the correct time, the timezone used by Audit Vault needs to be correct. This means that when the clocks go forward or back, the timezone offset needs to be altered.

To check the current timezone offset, run the following command:

avca show_server_tz

To change the timezone offset, run the following command:

avca set_server_tz -offset +00:00


Reinstalling Collection Agents

Oracle Audit Vault does not support the reinstallation of Collection Agents under the same name as it requires every Agent to be unique. Any attempt to reinstall an Agent will result in the error:

Error1: An agent with the given name is already installed on this machine.

However, it is possible to circumvent this. Behind the scenes, all the agent details are stored in the AVSYS.AV$AGENT table. By examining the contents of this table before and after installing an Agent shows that the STATUS column is used to indicate whether or not the Agent has been installed. A STATUS of 1 indicates an installed Agent and a STATUS of 2 indicates an Agent that is yet to be installed.

To reset the Agent to its pre-installed state, simply run the command:

UPDATE AVSYS.AV$AGENT SET STATUS=2 WHERE AGENT_NAME='myAgent01';

on the Audit Vault server, where myAgent01 is the name of the Agent to be reinstalled.

Once this is done, the Agent installation should run as normal.

Overcoming the Reporting Limitations of Audit Vault

Oracle Audit Vault suffers from two significant drawbacks when it comes to reporting. Firstly, the number of records is limited to 20,000, which is fine for small, focused reports, but useless for a monthly consolidated logins report, which can often run to hundreds of thousands of records.

Secondly, the formatting options provided by Audit Vault are severely limited. There is no facility to alter date formats, column widths or font, for example.

In order to overcome these limitations, other tools need to be used. All such tools will access the data in fundamentally the same way – a SQL query. Oracle provides a fairly good overview of the reporting schemas in the Auditor’s Guide (available though the OTN website), but viewing the schema descriptions in Enterprise Manager or using SQL*Plus is also useful.

As an example of how to “convert” a standard Audit Vault report into a SQL query, I have used the Database Login/Logoff report. I wanted to show all the logins and logoffs on a busy server for a particular month. When running the report in Audit Vault, I get the message: “The current settings would result in more than 20,000 rows. Please add more filters to ensure complete and correct results”. Here is how I went about constructing the query (skip ahead to the end to see the finished query):

Step 1: Identifying the columns

As my intention is to recreate the report, I will be using the same columns. Opening the Database Login/Logoff report from the Compliance Reports tab gives me all the information I need. I make a note of the column headings:

  • Source
  • Event
  • User
  • Authentication Method
  • OS User
  • Event Status
  • Event Time

Step 2: Identifying the tables

The key table that represents the audit records is AVSYS.AUDIT_EVENT_FACT. So the first task is to identify which of the columns can be found in that table. As it turns out, the only column present in that table is Event Time, which means all the others are in other tables.

Audit Vault uses two suffixes on its auxiliary tables: _DIM & _TAB. A quick look through the available _DIM and _TAB tables gives us most of the other tables needed (all in the AVSYS schema):

  • SOURCE_DIM
  • EVENT_DIM
  • USER_DIM
  • AUTHENTICATION_METHOD_TAB
  • EVENT_STATUS_TAB

That just leaves the OS User column. Audit Vault uses the USER_DIM table to store both Oracle and OS users, so we will need to link that table to AUDIT_EVENT_FACT twice.

Step 3: Identifying the correct column names

Now that we know which tables the columns will be coming from, we can find the correct name for the column. For example, the OS User column is actually AVSYS.USER_DIM.USER_NAME and the Authentication Method column is actually AVSYS.AUTHENTICATION_METHOD_STR. Most of these should be fairly obvious from the table descriptions.

Step 4: Constructing the first half of the query

We can now use the information we have to construct the first half of the query. This will be the SELECT and FROM parts of the query. To make the writing of the query more manageable and to allow the addition of two USER_DIM tables, I will be giving each table a short name consisting of the table initials.

SELECT
sd.SOURCE_NAME Source,
ed.EVENT_NAME Event,
ud1.USER_NAME User,
amt.AUTHENTICATION_METHOD_STR Authentication_Method,
ud2.USER_NAME OS_User,
est.EVENT_STATUS Event_Status,
aef.EVENT_TIME Event_Time
FROM
AVSYS.AUDIT_EVENT_FACT aef, 
AVSYS.SOURCE_DIM sd, 
AVSYS.USER_DIM ud, 
AVSYS.EVENT_DIM ed,
AVSYS.EVENT_STATUS_TAB est, 
AVSYS.AUTHENTICATION_METHOD_TAB amt, 
AVSYS.USER_DIM ud2

Step 5: Linking the tables

The first half of the WHERE clause contains the links between the AUDIT_EVENT_FACT table and the auxilliary tables. All the _DIM tables are linked from the respective _DIM column in AUDIT_EVENT_FACT to the DIMENSION_KEY column od the _DIM table. E.g. The AVSYS.AUDIT_EVENT_FACT.EVENT_DIM column is linked to the AVSYS.EVENT_DIM.DIMENSION_KEY column.

The _TAB tables are linked using the respective _ID columns in both tables. E.g. The AVSYS.AUDIT_EVENT_FACT.EVENT_STATUS_ID column is linked to the AVSYS.EVENT_STATUS_TAB.EVENT_STATUS_ID column.

Using this method, the first half of the WHERE clause is as follows:

WHERE
aef.SOURCE_DIM = sd.DIMENSION_KEY AND
aef.EVENT_DIM = ed.DIMENSION_KEY AND
aef.USER_DIM = ud1.DIMENSION_KEY AND
aef.AUTHENTICATION_METHOD_ID = amt.AUTHENTICATION_METHOD_ID AND
aef.OSUSER_DIM = ud2.DIMENSION_KEY AND
aef.EVENT_STATUS_ID = est.EVENT_STATUS_ID

Step 6: Narrowing the selection

The last step is to add additional criteria to the WHERE clause in order to just see the entries we need. We also need to order the data correctly with an ORDER BY clause. The criteria we need are:

  • Source restricted to the DB we are reporting on – mytestdb01
  • Event restricted to LOGON and LOGOFF
  • Event Time restricted to the month of March 2012
  • Ordered by date, oldest record first

This is accomplished with the following additions to the WHERE clause:

AND
sd.SOURCE_NAME = 'mytestdb01' AND
ed.EVENT_NAME IN ('LOGON','LOGOFF','SUPER USER LOGON','LOGOFF BY CLEANUP') AND
aef.EVENT_TIME >= TO_DATE('01/03/2012','DD/MM/YYYY') AND
aef.EVENT_TIME < TO_DATE('01/04/2012','DD/MM/YYYY')
ORDER BY EVENT_TIME

Final Query

Here is the final query:

SELECT
sd.SOURCE_NAME Source,
ed.EVENT_NAME Event,
ud1.USER_NAME User,
amt.AUTHENTICATION_METHOD_STR Authentication_Method,
ud2.USER_NAME OS_User,
est.EVENT_STATUS Event_Status,
aef.EVENT_TIME Event_Time
FROM
AVSYS.AUDIT_EVENT_FACT aef, 
AVSYS.SOURCE_DIM sd, 
AVSYS.USER_DIM ud, 
AVSYS.EVENT_DIM ed,
AVSYS.EVENT_STATUS_TAB est, 
AVSYS.AUTHENTICATION_METHOD_TAB amt, 
AVSYS.USER_DIM ud2
WHERE
aef.SOURCE_DIM = sd.DIMENSION_KEY AND
aef.EVENT_DIM = ed.DIMENSION_KEY AND
aef.USER_DIM = ud1.DIMENSION_KEY AND
aef.AUTHENTICATION_METHOD_ID = amt.AUTHENTICATION_METHOD_ID AND
aef.OSUSER_DIM = ud2.DIMENSION_KEY AND
aef.EVENT_STATUS_ID = est.EVENT_STATUS_ID AND
sd.SOURCE_NAME = 'mytestdb01' AND
ed.EVENT_NAME IN ('LOGON','LOGOFF','SUPER USER LOGON','LOGOFF BY CLEANUP') AND
aef.EVENT_TIME >= TO_DATE('01/03/2012','DD/MM/YYYY') AND
aef.EVENT_TIME < TO_DATE('01/04/2012','DD/MM/YYYY')
ORDER BY EVENT_TIME

Alerting on Out-of-Hours Logins

Oracle Audit Vault provides lots of built-in functionality for creating alerts but one useful one that is missing is the ability to alert on people logging in outside of office hours. This can easily be arranged by using the to_char function on #EVENT_TIME#. For example, the following is the code for generating an alert if someone logs in on a Saturday or Sunday, or between the hours of 7 pm and 7 am.

(#SOURCE_EVENTID# ='100' OR #SOURCE_EVENTID# ='20001') AND 
((TO_CHAR(#EVENT_TIME#, 'DY') = 'SAT' OR 
TO_CHAR(#EVENT_TIME#, 'DY') = 'SUN') OR 
(TO_CHAR(#EVENT_TIME#, 'HH24') >= '19' OR 
TO_CHAR(#EVENT_TIME#, 'HH24') < '07'))

Encrypting Audit Vault Data

EDIT: There is a bug in Audit Vault that prevents the addition of collection agents when TDE is used. The bug number is 13858105 and should be fixed in a future release of Audit Vault. The workaround is to not move the AV$ tables, such as AV$AGENT to the encrypted tablespace.

Audit logs can contain sensitive information and as such there is a strong argument for storing the audit logs encrypted. The easiest way to accomplish this is to implement Transparent Data Encryption (TDE) at a tablespace level and move the audit data into this tablespace.

By default, the audit data schema (AVSYS) is stored in the SYSAUX tablespace. This schema is protected by a Database Vault Realm. Audit Vault also uses Partitioning for Lifecycle Management, and three of the tables in the AVSYS schema are subpartitioned using Range-List Composite Partitioning.

With all of that taken into account, the steps are as follows:

  1. Enable TDE
  2. Create an encrypted tablespace
  3. Alter the AVSYS user to use the encrypted tablespace by default
  4. Move the tables and subpartitions to the encrypted tablespace
  5. Set the default attributes of the partitioned tables and partitions to use the encrypted tablespace
  6. Rebuild indexes

Enabling TDE

Setting up TDE involves the creation of an encryption wallet and optionally setting it to auto-open. First, create the wallet folder with the command:

mkdir /path/to/wallet

Then add this location to the sqlnet.ora file by adding the following line to it:

ENCRYPTION_WALLET_LOCATION =
  (SOURCE =
    (METHOD = FILE)
    (METHOD_DATA =
      (DIRECTORY = /path/to/wallet)
    )
  )

Finally, create the wallet and set it to auto-open using Enterprise Manager. Navigate to the Server tab and select Transparent Data Encryption from the Security section. Under Create Wallet, select the first option: Encryption Wallet, then click the Create Button. Enter the appropriate account details and a password for the wallet.

After creating the wallet, you can set it to auto open by selecting Auto-Open Wallet under Create Wallet and then clicking the Create button and entering the account details and wallet password as necessary.

Creating and Encrypted Tablespace

Creating an encrypted tablespace is done in the same way as a normal tablespace with the addition of either a tick in the Encryption box (if using Enterprise Manager) or by adding the DEFAULT STORAGE ( ENCRYPT ) ENCRYPTION USING ‘AES192’ clause to the CREATE TABLESPACE statement (if using sqlplus). E.g.

CREATE SMALLFILE TABLESPACE "ENCTS" DATAFILE '/path/to/oradata/encts01.dbf'
   SIZE 100M AUTOEXTEND ON NEXT 20M MAXSIZE UNLIMITED LOGGING
   EXTENT MANAGEMENT LOCAL SEGMENT SPACE MANAGEMENT AUTO
   DEFAULT STORAGE ( ENCRYPT ) ENCRYPTION USING 'AES192';

Setting up the AVSYS User

AVSYS has the UNLIMITED TABLESPACE privilege by default so there is no need to set up a quota on the encrypted tablespace. AVSYS should, however, have its default tablespace set to the encrypted tablespace. E.g.

ALTER USER AVSYS DEFAULT TABLESPACE "ENCTS";

Moving the Data

There are over a hundred tables, and many subpartitions (depending on how long Audit Vault has been running) so the movement of data is best done using a script. The following script generates and runs a second script based on the tables and partitions that exist at the time it is run. This script need to be run as a user with Realm access to the Audit Vault Realm, such as the AVSYS user (which will need to be unlocked and given a password). This user should be locked and expired again after running the script:

set sqlprompt '' heading off feedback off echo off linesize 500
spool move_avsys.sql
select 'ALTER TABLE AVSYS.'||table_name||' MOVE TABLESPACE ENCTS;' from dba_tables where owner='AVSYS' and partitioned='NO' and TABLESPACE_NAME='SYSAUX';
select 'ALTER TABLE AVSYS.'||table_name||' MODIFY DEFAULT ATTRIBUTES TABLESPACE ENCTS;' from dba_tables where owner='AVSYS' and partitioned='YES';
select 'ALTER TABLE AVSYS.'||table_name||' MODIFY DEFAULT ATTRIBUTES FOR PARTITION '||partition_name||' TABLESPACE ENCTS;' from dba_tab_partitions where table_owner='AVSYS';
select 'ALTER TABLE AVSYS.'||table_name||' MOVE SUBPARTITION '||subpartition_name||' TABLESPACE ENCTS;' from dba_tab_subpartitions where table_owner='AVSYS';
select 'ALTER INDEX AVSYS.'||index_name||' REBUILD SUBPARTITION '||subpartition_name||';' from dba_ind_subpartitions where index_owner='AVSYS';
spool off
@move_avsys.sql

This script will move the tables and subpartitions to the encrypted tablespace and set the default attributes of the partitioned tables and partitions to use the encrypted tablespace for any new subpartitions that are created. The partitioned indexes are then rebuilt.